Dreamweaver MX
Week 8 - November 7th 2006
External stylesheets
External Stylesheets are very similar to what we've been doing up to this point in the class. The only difference is that we're taking the styles out of the head of the document, and giving them their own file. Stylesheets are saved with a .css extension. External sheets are important because you can use them on multiple pages. They're similar to templates, in the way that if you want to change something, you only have to change it once and all the pages linked to it will have the new styles applied instantly.
There is a BIG difference however. Templates only update locally in the Dreamweaver sites, but you don't actually need the files online for the pages to work. External Stylesheets, however, must be uploaded to your remote site. None of your files have to be local when you change the css file. It's more like an image or a flash file, than the template file. You can edit it and save it, and the pages will just load the content. Just as if you were to take an image file into a drawing program and add to it. Your pages will not prompt you asking if you want to update them, because you're not actually changing the HTML page. You're only changing the external file. Every time you load your HTML page in a browser, it will load the external css file and apply the styles to the page.
CSS Link States
CSS allows you to create "rollover" states without using Javascript. If you create a basic HTML page with no styling applied to it, you'll notice that your anchor tags have styling defaultly applied to them. All your links are blue, when you click down on them and before you let go, you'll notice that the colour changes to red (in Firefox, IE doesn't change the active colour defaultly), and when you return to that page the link is now purple.
CSS allows you to control these changes to match with your HTML page. Up until this point we have just been styling the <a> tags. What we're going to do now is expand on this and style the different states. This can be accomplished by using the following css:
- a:link
- a:active
- a:visited
- a:hover (This states has no default)
A:link refers to the original state of the link when someone first comes to your page. A:active is the state where your mouse button has been pressed down but not yet released (where the link turns red in Firefox). A:visited is the state of the link when you return to the page and normally goes purple. A:Hover, is what we can use to replace the javascript rollover. This is the state of the link when our mouse is "hovering" or being held overtop of the link but not yet clicking.
You don't have to use all four states, it's up to you. You can also continue to style the <a> tags, and just add a hover state. If you don't want to use the visited state, you should reference the <a> tag directly. Once you've begun to style the individual states, the default styles will appear where you haven't specified a style (ie, if you style a:link and a:hover, but not a:active or a:visited, the red and the purple will show up on your page).
Image for today's hover exercise:
![]()
Assets Panel
We touched briefly on the Assets panel in week 1, but since this is part of our course outline, I'll touch on it again. Now that we've used images, flash, sound, movies, etc in our pages, we can take a closer look at how this panel works. You'll notice down the left side is a series of icons, most of these icons should look familiar to you.
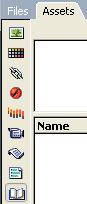
From top to bottom, the icons represent Images, Colours, URLs, Flash Elements, Shockwave Elements, Movie Files, Scripts, Templates, and Libraries. This panel will show all of the objects within your entire site of the specified file type. So you can view all the images from all your pages, or all of the flash elements from all of your pages. This panel will also show you a preview of these objects.
History Panel
The History panel will show you a list of steps that you have done while working on your page.
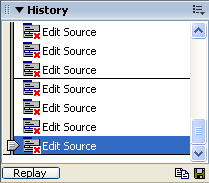
The number of steps it will show depends on what number has been specified in your Dreamweaver Preferences. This panel will allow you to undo multiple steps quickly, rather that hitting undo multiple times. To do this, grab the slider on the left side, and drag it up to the step you want to backup to. This panel will also allow you to redo steps, not as in redo something you've undone, but it will allow you to perform the same action multiple times. This is accomplished by selecting the step and hitting the "replay" button. This would be similar to using copy and paste to put the same text in multiple times. You can also copy these steps to the clipboard (your computers memory cache for copy and paste), but it can only handle certain actions, and Dreamweaver will tell you if it can't handle a step. You can also save steps from the history to reuse in other pages.
Tag Editor
The Tag Editor allows you to change how your tags will format in Dreamweaver's code view. You can get to this by going to Edit > Tag Libraries. You'll see a list of tags, split into categories. The Tag Library will also allow you to create your own custom tags. You can make news tags and specify the attributes that you want associated with the tag. In doing this though, you should probably create a custom Schema to inform the browser how it should handle this tag. For the tags we already use, a universal Schema (or DTD - Doc type declaration) has already been created and incorporated into all browsers. In the case of making your own tags, the browsers won't recognize your tag, and in order for the browser to recognize it, you'll need to make this definition yourself, but that's a little out of scope for this class.